Learning how to frame a saltbox roof and build it adds character and beauty to your property. It also gives practical benefits, such as more internal space and improved water drainage.
Framing a saltbox roof needs precision and careful design, whether building a new home or remodeling an old one. Only Roofing Woodlands TX walks you through the detailed procedure of how to frame a saltbox roof efficiently.
Gathering Materials and Tools
Acquiring all of the equipment and materials required to frame a saltbox roof is the first step in learning how to do so. You will need blunder for the rafters, edge bar, and decking, as well as nails, screws, and metal connectors to keep the pieces intact.
Likewise, guarantee you have the fundamental power gear, for example, a roundabout saw, nailer, and level, to ensure accuracy and productivity during development.
Preparing the Roof Structure
Before framing the saltbox roof, you must prepare the current roof structure or construct a new one if starting from scratch. Ensure the supporting walls are strong enough to sustain the roof’s weight. Reinforce the walls and install extra bracing as needed to increase stability.
Measure and Cut Rafters
Next, measure and cut the rafters to the proper length and angle. Because the saltbox roof has two distinct slope angles, each rafter must be cut at a certain angle to integrate smoothly into the overall design.
Use a framing square and protractor to measure and mark the angles correctly before cutting the rafters with a circular saw.
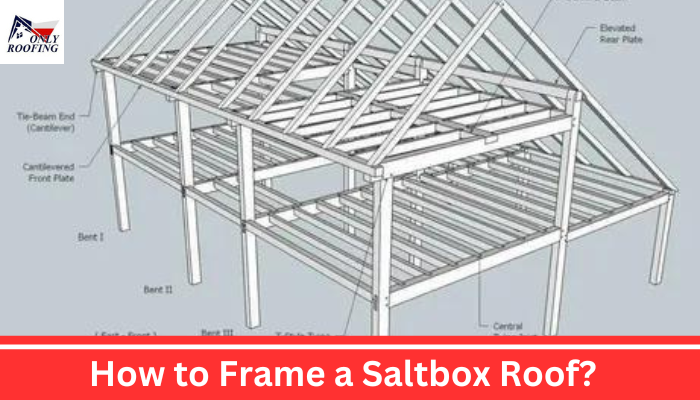
Installing Rafters and Ridge Beams
Once the rafters have been trimmed to size, you must install them alongside the ridge beam. Begin by connecting the ridge beam to the apex of the roof structure with metal connectors or framing brackets.
Now, put the rafters along the walls, ensuring they are uniformly spaced and aligned with the ridge beam. Secure the rafters with nails or screws, ensuring they are level and plumb.
Adding Roof Decking
The next stage after introducing the rafters is to install the decking. Sheets of compressed wood or OSB (situated strand board) are laid over the rafters and got with nails or screws.
Stagger the seams between the sheets to increase strength and stability. Consider adding a moisture barrier or underlayment to prevent your roof from water damage.
Conclusion
To learn how to frame a saltbox roof, careful planning, precise measurements, and attention to detail are required. By adhering to the bit-by-bit directions above, you can fabricate a saltbox rooftop that adds magnificence and character to your home and gives long-haul security from the climate. Whether you’re a carefully prepared worker for hire or a Do-It-Yourself lover, constructing a saltbox rooftop on your property’s private business material will be an incredible encounter.
Read More:
