Rubber roofs, specifically EPDM (Ethylene Propylene Diene Monomer) roofing, are popular for their durability and low maintenance. However, like any roofing material, they can develop issues over time. Whether you’re dealing with leaks, punctures, or seams that need sealing, repairing a rubber roof can be a manageable DIY project if you follow the right steps. Here’s a comprehensive guide to help you effectively repair your rubber roof.
1. Assess the Damage
Begin by inspecting the rubber roof to identify all areas needing repair. Look for common issues such as leaks, punctures, or damaged seams. Use binoculars to examine hard-to-reach areas safely. Document the damage to ensure you address every issue.
2. Gather Your Tools and Materials
To repair a rubber roof, you’ll need several tools and materials, including:
- Safety ladder and harness
- Rubber roof repair kit (includes rubber patches and adhesive)
- Utility knife
- Wire brush or sandpaper
- Cleaner (recommended for rubber roofs)
- Silicone or rubber roof sealant
Ensure you have all necessary items before starting the repair process.
Visit here: Commercial Roofing The Woodlands Tx
3. Clean the Area
Properly clean the area around the damage. Use a wire brush or sandpaper to remove any dirt, debris, or loose material from the surface. Cleaning is crucial for ensuring that the repair materials adhere properly. Use a cleaner suitable for rubber roofs to prepare the surface for the repair.
4. Repair Punctures and Tears
For small punctures or tears, apply a rubber roof repair patch. Cut the patch to a size that extends a few inches beyond the damaged area. Apply a layer of adhesive or sealant to the patch and the surrounding area, then place the patch over the damage. Press down firmly to ensure a secure bond. Allow the adhesive to cure as per the manufacturer’s instructions.
5. Seal Seams and Joints
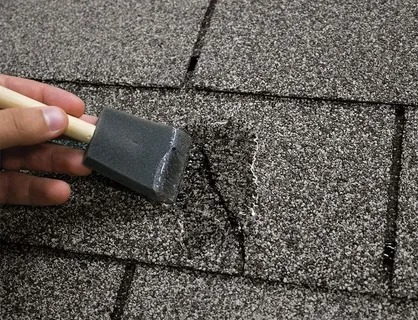
Seams and joints are common trouble spots on rubber roofs. Inspect these areas for any gaps or separation. Apply a rubber roof sealant to the seams, ensuring that it fills any gaps and creates a watertight seal. Smooth the sealant with a brush or tool to ensure even coverage and adhesion.
6. Inspect and Maintain
After completing the repairs, conduct a thorough inspection of the entire roof. Check that all repairs are secure and that there are no remaining issues. Regular maintenance is key to prolonging the life of your rubber roof. Schedule periodic inspections and cleanings to prevent future damage and ensure the integrity of your roof.
Conclusion
Repairing a rubber roof can be straightforward with the right approach and tools. By assessing the damage, cleaning the area, and applying appropriate repair techniques, you can effectively address leaks and other issues. Regular maintenance will help keep your rubber roof in excellent condition and extend its lifespan. Follow these steps to ensure a successful repair and protect your home from water damage.
Read More About
how much does a roof leak repair cost
