Residence in regions prone to heavy snowfall presents both benefits and obstacles. While its beauty cannot be denied, living there also increases your risk for ice dams – accumulations of ice along roof edges that accumulate and potentially cause leakage and structural damage if left alone for too long. At ONLY ROOFING, our mission is to meet all your Residential Commercial roofing needs – this includes protecting against winter-related issues with heat tape installations on roofs – this guide is here to assist with “How to install heat tape on roof?”
Essential Materials for Roof Heating Systems
- Roof-specific heat cable with suitable wattage for your roof dimensions
- Roof heat cable clips
- Asphalt roof cement
- Caulk gun
- Paint scraper (optional)
- Power drill (optional, for metal roofs)
- Electrical outlet with GFCI protection (seek assistance from a qualified electrician if necessary)
Prioritize Safety Precautions Before Beginning
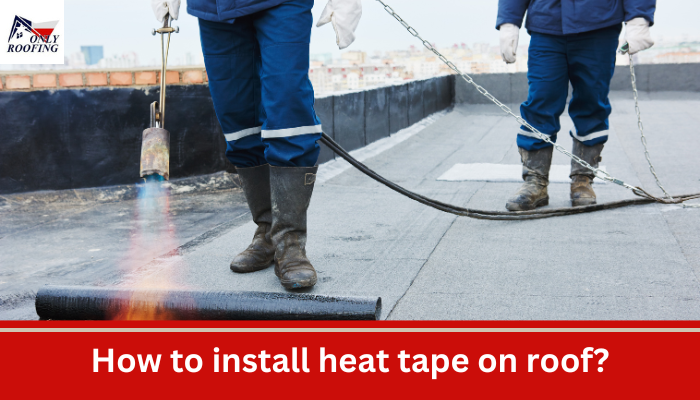
Always put safety first when undertaking roofing-related tasks. Wear slip-resistant footwear, work gloves and safety goggles by manufacturer specifications for the task at hand; alternatively, enlist the services of a professional roofer in case working at heights doesn’t feel safe to you.
Step-By-Step Guide
1. Design Your Layout
To plan a proper installation plan for heat cable heating systems on roofs, begin by measuring its length. From there, sketch out an arrangement with particular emphasis placed upon areas like eaves, valleys and gutters where heat cable heating will most benefit.
2. Prepare the Roof Surface
Remove any debris present on the roof surface before carefully scraping away ice build-up with a paint scraper to maintain a clear working environment.
3. Install Cable
Based on your plan layout, securely fasten the heating cable using roof heat cable clips for fast installation. Be mindful to follow manufacturer specifications regarding spacing recommendations to ensure optimal installation results.
4. Seal Cable (Optional)
To provide additional protection and ease maintenance and access, consider sealing your cable with asphalt roof cement for additional layers of protection. Ensure clips remain exposed for easy maintenance access.
5. Establish the Cable Routes
Route your cable along eaves, valleys and gutters for proper drainage, with loops at either end to aid with draining before sending downspout.
6. Electrical Connection
Connect the heating cable to a GFCI outlet for additional safety by cutting power in case of ground fault detection. If none are readily available, consult a licensed electrician for proper installation and use.
Pro Tip: Consider investing in self-regulating heat cables. These cords automatically adjust their output based on ambient temperatures, helping prevent overheating while saving energy and conserving resources.
How far apart should heat tape be on a roof?
The space of heat tapes in a roof is typically dependent on the type of roof and slope. A common rule of thumb is between 2-4 inches, with a zigzag design around the perimeter. This pattern creates channels that allow melting snow or ice to move away from the roof in a safe manner. If your roof is steeper or where snowfall is heavier there may be a need for a more precise spacing. Be sure to follow the guidelines of the manufacturer to ensure proper installation and effectiveness.
Keep It to the Experts
While DIY roof maintenance can be rewarding, installing heat cables requires careful consideration and execution. If any steps of this process need to be clarified for you, please reach out to ONLY ROOFING’s experienced team for roofing in Woodland TX; with their knowledge and skill, we’re confident we’ll have your roof protected against winter-induced ice damming!
Faqs
What is heat tape and how does it work on a roof?
Heat tape (also known as heat cable) is an electrical cable installed on roofs and in gutters to prevent ice dams and icicles from forming. It works by warming the roof’s edge just enough to keep melting snow flowing through gutters and downspouts, preventing backups that can cause leaks and structural damage.
Where should I install heat tape on my roof?
Install heat tape:
- Along roof eaves (in a zigzag pattern)
- Inside gutters and downspouts
- Along roof valleys
- Near overhangs or areas prone to ice buildup
How do I install heat tape on my roof safely?
- Plan your layout – Use a zigzag pattern on eaves and run the cable inside gutters/downspouts.
- Attach heat cable using roof clips – Space clips every 18–24 inches.
- Plug into a GFCI-protected outlet – Preferably use a self-regulating cable to avoid overheating.
- Test the system – Ensure it activates in cold conditions.
For safety, always follow the manufacturer’s instructions and avoid overlapping cables. Consider hiring a professional for steep or high roofs.
Do I need a thermostat or timer with roof heat tape?
While not required, using a thermostat or temperature/moisture sensor is highly recommended. It automates the system to turn on only when needed (typically below 40°F), reducing energy costs and fire risk. Some heat tape kits come with built-in thermostats, while others can be paired with external controllers.
