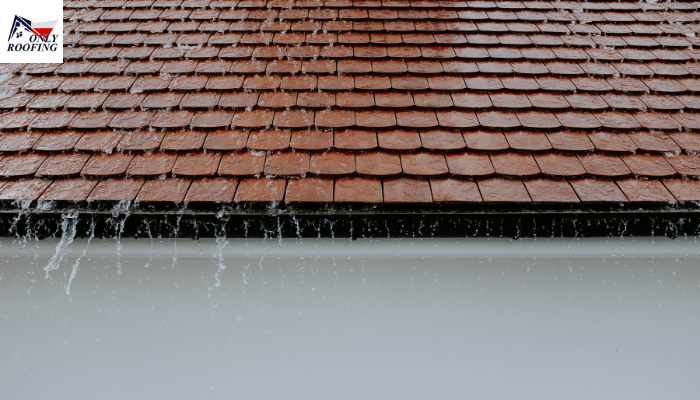
Roof cap shingles also known as ridge caps add the final flourish while protecting vulnerable ridges against leakage while giving an aesthetic finishing touch for an aesthetically pleasing result. But How to install roof cap shingles? – This blog post is here to provide both DIYers and professional roofers in Spring Tx with everything they need to know for installing roof cap shingles themselves.
Before You Begin: Essential Tools and Materials
- Prioritize Safety When Working On Roof
- Roof Cap Shingles for optimal results when selecting new shingles to cap existing ones.
- Use nails specially made for roofing following manufacturer recommendations regarding length.
- Wedge Hammer, Choose one equipped with magnetic nail holders for increased efficiency.
- Tape measure for accurate shingle placement.
- Caulking gun and sealant compatible with your roof material.
- Chock lines for marking alignment lines of shingles on straight paths for alignment purposes
- Work boots that provide both stability and grip
- Traversing rooftops are essential tool in installing roof cap shingles successfully.
Step-by-Step Guide to Installing Roof Cap Shingles
1. Preparation Is Key
- Clear the Work Area: Remove debris or obstructions from the roof’s surface to create an open, safe work environment.
- Inspect the Ridge: Check for damage on both underlayment and ridge itself that needs attention before proceeding with the installation of roof components.
- Ventilation Check: Be certain there is adequate ventilation at the ridge vent site if installing one.
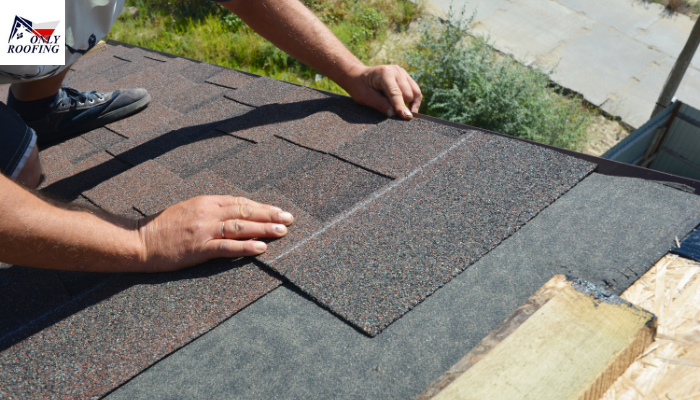
2. Starting Right: The First Shingle
- Cut the Shingle: For your initial shingle at the gable end, cut away its colored surface layer to expose its adhesive underside for secure sealing purposes.
- Apply Sealant: Apply a generous bead of sealant around its edge at this first step for optimal sealing results.
- Position the Shingle: Make sure the cut shingle sits properly over its sealed edge, with its exposed underside adhering properly to it.
- Nail it Down: Secure the shingle using two nails from either side of an exposed tab according to manufacturer recommendations for nail placement pattern.
3. Shingle Sequencing
- Subsequent Shingles: For subsequent shingles, only use full and uncut pieces.
- Overlapping Technique: Use an overlap technique of at least 2 inches between each new shingle to facilitate proper water drainage.
- Nailing Technique: Secure each shingle securely using two nails according to manufacturer specifications.
- Alignment Is Key: Utilize a chalk line as a measuring stick to ensure consistently straight alignment of all edges along the ridgeline of all your shingles.
4. Ridge Vent Considerations
When using a ridge vent on your roof, be mindful that cap shingles don’t restrict airflow – leave an opening at the base edge for ventilation purposes. Incorporate small gaps at each edge shingle for proper airflow.
5. Reaching the Peak: Final Touches
- Cutting the Final Shingle: As with the previous step, cut away colored sections at both gable ends of the final shingle using similar methods as those described for its installation.
- Sealing and Nailing: Apply sealant over this final one similar to how other layers had been secured using nails previously.
If your DIY skills don’t quite measure up to expectations or you lack experience installing roofs yourself, turn to professional roofing contractors in Spring TX to take over, they will ensure a safe and top-quality installation experience!
How to attach ridge cap shingles?
Installing ridge cap shingles on a roof is an essential step to finishing the roof and safeguard the roof from the possibility of leaks. Begin by putting roof shingles with a ridge cap shingle at the edge of the ridge, which is in opposition to the predominant wind direction. Utilize specially-designed roof shingles for ridge caps or cut a standard 3-tab shingle into three pieces. Then, place each shingle in the ridge and over the preceding one by around 5 to 6 inches. Attach them using two roofing nails per shingle. They should be approximately 1 inch away from each side. Ensuring that nails have enough length to get through the decking is essential. Keep overlapping until you get to the final roof cap shingles, and then fix the final shingle using roofing cement to avoid wind uplift. A properly installed roof will give you a neat-looking, professional appearance and lasting roofing security.
Final Thoughts
How to install roof cap shingles? – By adhering to these guidelines and being aware of your limitations, roof cap shingle installation will become much less daunting, whether done yourself or sought professional assistance through Only Roofing. Installing roof cap shingles is usually manageable for experienced individuals; however, in certain instances, professional help should be sought from roofing replacement woodlands in Spring.
Remember: A properly installed roof means peace of mind for everyone involved!
FAQs
- What are roof cap shingles, and why are they important?
Roof cap shingles, also known as ridge cap shingles, are installed along the peak (ridge) of a roof. They provide the finishing touch to a roofing system and protect the roof’s ridge from water penetration, wind damage, and leaks.
- Can I use regular shingles as cap shingles?
Some roofers cut 3-tab asphalt shingles into thirds to create ridge cap shingles. However, pre-manufactured cap shingles are more durable and provide a cleaner, more uniform look.
- How do I install roof cap shingles correctly?
Start from the end opposite the prevailing wind and overlap each shingle, nailing them securely into place. Use roofing nails long enough to penetrate the ridge and underlying decking, and apply roofing cement to enhance adhesion and waterproofing.
4. Do I need special tools or materials to install cap shingles?
Basic tools include a utility knife, roofing nails, a hammer or nail gun, and roofing cement. Pre-cut cap shingles can simplify the process, but regular 3-tab shingles can be trimmed and used.
Read More:
Roof sheathing be flush with fascia
