As a homeowner, knowing the basics of how to install roof ridge vent is imperative to learn the differences between the types of intake and exhaust vents so you can judge and decide which ventilation system would be the best and imperishable in the long run.
Ridge vents are in demand among the people because they provide adequate fresh air circulation in the roof and attic space. They are typically made of high-grade plastic or metal. And it is a wise choice to match the roofing material and the vents you will mount on your home’s exterior crown.
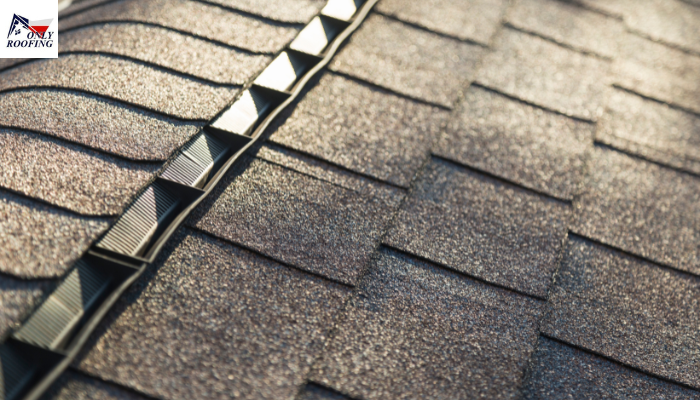
Ridge vents are also called continuous vents because rather than obstructing the roof line the way other raised vents do, a ridge vent is too low-profile to be noticed.
Primary Types of Ridge Vents
Regardless of the two primary types of ridge vents, the prerequisite or preparatory process of the roof ridge or roof’s peak is similar for their installation.
- Shingle-over Vents
Shingle-over vents are installed at the peak of the roof. They are covered over by asphalt shingle caps that must be congruent with the surrounding roof shingles.
- Aluminum Ridge Vents
Aluminum ridge vents resemble the shape of mushrooms. They are coupled with a wide flange on both sides that settles on the top of the roof shingles. These aluminum caps are finished products and do not need additional asphalt shingle ridge cap covering.
Is Incision of Ridge Roof Vents Necessary?
If you’re wondering, ‘Should ridge vent go all the way across roof?’ the solution couldn’t be a simple yes or no because it depends on the roofing strategies you’re going for. Installing vent caps all the way to the edge is a doable task; for that, you don’t need to cut ridge vents.
The aesthetics you wish to embark on in your house is the decisive factor regarding how far you place the vents.
Prerequisites to How to Install Roof Ridge Vent
Before diving into the details of how to install a roof ridge vent, it is mandatory to equip yourself with precautionary measures. For instance, if you’re about to work on heights like roofing repair or replacement, you need to wear a piece of head-to-toe fall-arrest equipment. The likelihood of potential injuries is reduced to a great extent in case of the occurrence of an unfortunate mishap or a mere foot slip.
Working on a roof with sturdy tools is quite a physically-demanding task. Suppose you’re planning to take this challenge. In that case, breaking the job into small segments is recommended to avoid the risks of accidents.
How to Install Roof Ridge Vent: A Step-by-Step Guide
Equip yourself with the following materials and tools before beginning the procedure of how to install roof ridge vent.
- Equipment: Hammer, flat pry bar, cats paw pry bar, utility knife with a hook blade, chalk line, circular saw, fall-arresting costume
- Materials: 8d nails, ridge vents, 1 ½ inch 1 ¾ inch roofing nails, standard roof shingles, polyurethane caulk, shingle caps (for shingle-over vents)
Instructions
Follow these instructions to start the installation of ridge vents
- Remove the Shingle Caps
Begin the vents installation procedure by starting at the end with the last overlapping shingle. Remove the nails that are holding ridge cap shingles in place. Each ridge cap has two nails – one on either side.
Remove the shingle cap by inserting a flat pry bar beneath the shingle cap. Now lift both the nail head and shingle up so they are displaced. Prying out the nail will remove the cap.
A utility knife coupled with a hook blade incises the shingle back from the ridge – cut at 3 inches or as the professional recommends. The three-inch wood decking along the ridge is exposed after the underlayment or all-felt-paper is removed.
- Carve the Ventilation Opening
This step requires wood decking back along the ridge to be cut or carved out. Creating an inch of clearance on either side of the ridge pole would be ideal to permit air circulation through the opening points and into the vent. In case of the absence of a ridge board, the opening must be made at least one inch from the ridge on both sides – for instance, some truss-framed roofs.
Now measure from each side of the ridge and use a chalk line to make cutting lines on the roof deck or patio cover. A cat’s paw pry bar and a hammer remove all the nails above or running through the chalk line.
New 8d nails are driven to secure the decking beneath each chalk line. Carve the deck lines along the chalk line with the help of a circular saw. Make sure the circular saw only reaches the decking and not the trusses or rafters.
- Installing Shingle-Over Vents
Mounting shingle-over vent along the reference line that must be chalked through the recommended marks. Secure the vent to the decking along that side. Attach the other side of the vent to the opposite side of the ridge to mount the vent securely. Finish the job by installing asphalt shingle caps over these vents.
- Installing Aluminum Vents
Aluminum ridge vents are installed along the reference line. The vent must be fastened to the rafters and roof deck by nailing through the flange on both sides. Make sure to follow the recommended nail spacing.
Conclusion
If you’re planning to take the challenge of how to install roof ridge vent, only step in the field if you’re confident of your expertise, as it requires working for relatively longer durations on heights. To ensure ample ventilation in your house, consider hiring a professional if you’re anxious about heights or working on tall ladders.
